Thursday, September 30, 2010

Yabba Dabba OOOH!


Get ready to go bowling, break out your foot-powered car, and get your Dino on! Today is the 50th anniversary of the 1st episode of the Hanna-Barbera classic, 'The Flintstones'!!! Fun tidbit- for the longest time when I was a kid- I always thought that Hanna Barbera was a person, not the last names of two people. I eventually caught on though... Today's nail art is a tribute to the stone-age smile-inducers- the Flintstones (and the Rubbles). On my left hand, I have Fred, Wilma, and Pebbles Flintstone, with Dino on the ring finger, and a closeup of Fred's garb on the pinky. On the right hand, I painted The Great Gazoo on my thumb, then Barney, Betty, and Bamm-Bamm Rubble, with Bamm-Bamm's club on my pinky.


I used:

Left:

Thumb: Fred Flintstone

Orly Snowcone as a base, with American Apparel Summer Peach for his skin, then mixed with Color Club Best Dressed List for his stubble. For his tongue, I used a combination of American Apparel Palm Springs and Orly Pixy Stix, for his eyes, I used Sally Hansen Professional Lavender Cloud and for the hair and outlines, I used American Apparel Hassid.

Index: Wilma Flintstone

Orly Snowcone as a base, with American Apparel Summer Peach for her skin, as well as as a base for her hair. For her hair, I used CND Electric Orange. For her necklace and teeth, I used Sally Hansen Professional Lavender Cloud, China Glaze Salsa for her lips, then outlined everything in American Apparel Hassid.

Middle: Pebbles Flintstone

Orly Snowcone as a base, with American Apparel Summer Peach for her skin, as well as as a base for her hair. Like Wilma, I also used CND Electric Orange for Pebbles' hair. Sally Hansen Professional Lavender Cloud for her eyes and the bone in her hair. For her dress, I used Pure Ice Wild Thing, then outlined everything with American Apparel Hassid.

Ring: Dino

Orly Snowcone as a base, with Color Club Ms. Socialite for the purple, then mixed with American Apparel Palm Springs for his muzzle. I also used this combination in a different strength for his tongue. For his collar, I used Zoya Yummy, with Barielle Aura Angora for his 'dog' tag. I used Sally Hansen Professional Lavender Cloud for his eyes, and American Apparel Hassid to outline.

Pinky: Fred's 'suit'

CND Electric Orange as a base, with Zoya Yummy for his tie, with American Apparel Hassid to outline, and for the spots on the orange fabric.


Right Hand

Thumb: The Great Gazoo

Orly Snowcone as a base, with L.A. Girl Army Green for his face, CND Green Scene for his shirt and helmet, a mixture of CND Green Scene and
American Apparel Hassid for his collar, Sally Hansen Professional Lavender Cloud for his eyes, and American Apparel Hassid to outline everything.

Index: Barney Rubble

Orly Snowcone as a base, with MAC Abalone Shell for his skin, then mixed with Color Club Best Dressed List for his stubble, American Apparel Manila for his hair, OPI Ginger Bells for his 'suit', and American Apparel Hassid to outline everything.

Middle: Betty Rubble

Orly Snowcone as a base, with American Apparel Summer Peach for her skin, China Glaze Salsa for her lips, Sally Hansen Professional Lavender Cloud for her eyes, and American Apparel Hassid to outline, as well as for her necklace and hair.

Ring: Bamm-Bamm Rubble

Orly Snowcone as a base, with American Apparel Summer Peach for his skin, Sally Hansen Professional Lavender Cloud for his eyes and hair, CND Electric Orange with American Apparel Hassid to outline and for the spots on the hat.

Pinky: Bamm-Bamm's Club

Orly Snowcone as a base, with L.A. Girl Army Green for the club, outlined with American Apparel Hassid.

Topped everything off with 2 coats of Seche Vite top coat.

It's a living.

Tiny Update & Nerdy Math Nails

Sooo.... sorry I haven't put up a tutorial in a week. Just thought I would say I won't be able to get a tutorial up for another week, at least! I'm going on a trip all weekend (Fri-Sun) so it's going to be harder to make one with Saturday out. I also have been focusing on schoolwork instead of nail tutorials, so I apologize for that! I really would love to make tutorials like 3 times a week, but realistically it can't happen.

Meanwhile, here is a nail design that I did that wasn't something I would make in to a tutorial, but I thought they were pretty funny.


Pinky - Addition 
Ring - Subtraction

 
Middle - Multplication
Pointer - Division

Thumb - Pi

Heh heh, just showing you my nerdy side. (Btw, if I memorized the first 20 numbers of pi, does that make me a nerd?!) Haha, anyways....
P.S.
Heh heh.

Wednesday, September 29, 2010

People Say I'm Nuts


...but really, I'm just a-corny. :-D (bad joke)

A book came out yesterday from my FAVORITE author, David Sedaris, called 'Squirrel Seeks Chipmunk: A Modest Bestiary'. I bought it tonight, and I'm SO excited to read it. Seriously, if you haven't heard of him, or if you have, but haven't read any of his stuff yet, you seriously need to get on it. The man is a genius, and I've laughed more while reading his books or listening to him speak than I have at most comedians. His deadpan delivery and dry, self-deprecating humor will have you rolling, and I highly suggest, at the very least, LISTENING to one of his audiobooks. (My favorite is the Santaland Diaries, which chronicles his experience employed as an elf at Christmastime in a major department store) A while back, reader Shannon L. suggested that I do squirrel nails, and that got me thinking about acorns, and tonight, I joined both ideas together in honor of the new Sedaris book! :) The acorns turned out to be a funky version of a french manicure! (with lots of shading!! :-D)


and my nails with my new book.... :-D


I used American Apparel Palm Springs as a base, with butter LONDON Crumpet over it, then mixed OPI Ginger Bells with American Apparel Palm Springs and MAC Rich, Dark, Delicious for the tips, with a darker version of that mixture for the textured 'scales' on the acorn caps. For the shading on the acorn, I used a mixture of American Apparel Palm SpringsOPI Ginger Bells and MAC Rich, Dark, Delicious to shade, a mix of OPI Ginger Bells and American Apparel Palm Springs for the darker highlight, then pure American Apparel Palm Springs for the main highlight. For the thumb, I used OPI What's With the Cattitude? as a base, with American Apparel Palm Springs as a base for the squirrel, topped with OPI Ginger Bells, then a mixture of OPI Ginger Bells and MAC Rich, Dark, Delicious over that, then a few swipes of American Apparel Palm Springs around the eye, ear, and tail. For the eye, I used American Apparel Hassid, and for the grass I used CND Green Scene , L.A. Girl Army Green, and Pure Ice Wild Thing. Topped everything off with 2 coats of Seche Vite top coat.

Stand on the magic star, and you can see Cher!!

Tuesday, September 28, 2010

Friki Tiki


I've always loved the aesthetic of tiki masks, and the funky feel they have. I like the different face shapes and facial expressions that you can see on them, whether silly or scary, tiki culture is awesome!! Today's manicure is my interpretation of the wooden tikis that are often portrayed for parties and shindigs. :-D


I used Color Club Best Dressed List as a base, then mixed with MAC Rich, Dark, Delicious to shade, and mixed with American Apparel Palm Springs to highlight. Topped it all off with 2 coats of Seche Vite top coat.

Something I learned last night while making cookies- if you put chunks of caramel in cookies, you have to let them cool to remove them from the cookie sheet, otherwise you get a lot of broken cookies that you have to eat, because naturally, you can't give away broken cookies, now can you? (what, I think I've stumbled on a great idea here...more cookies for me!!)

Monday, September 27, 2010

Tarte Cosmetics Sale on ideeli!


There is a Tarte Cosmetics sale on Ideeli today!! it ends at 11:59 PST (so, approx 24 hours from this post). There are check stains, brow kits, foundations, mascara, and other odds n ends. Decent prices, too! :)

Check it out! Tarte Cosmetics Sale on Ideeli

Cross-hatching a Plan


So I broke down and checked out the MAC Venomous Villains collection tonight at the Pro Store. Bad idea. I have far more willpower than I thought, because it's all super pretty!! The mineralized shadows from Maleficent's color story are crazy sparkly and beyond gorgeous. The three polishes are pretty too, though, as I'm sure you know, two are dupes for the Orly Cosmic FX collection. The third, however, is called Bad Fairy, and is a magenta foil duochrome that flashes an orange-red color. Super pretty. While in the Forum Shops, I also came across Inglot, there is a STORE AT THE FORUM SHOPS NOW! (that is my excitement typing) I've never seen any of their products in person until tonight, and let me tell you, everything I saw was crazy awesome, and once I have money again, that place is going to be Dangerous (yes, capital D). Anyway- today's manicure utilizes Bad Fairy (yes, I broke down, I'm not a saint :-P)


I used MAC Bad Fairy as a base, with American Apparel Hassid for the crosshatch design. Topped it all off with 2 coats of Seche Vite top coat.

This pictures don't do this polish justice. It's super shiny, sparkly, foily goodness.

Sunday, September 26, 2010

He's Got a Way With Murder


We know him as Dexter, loving family man by day, serial killer that takes out the 'trash' by night. He's America's So-Called Favorite Serial Killer, and tonight IS the night... for the season premiere, that is. I'm one of the devoted followers of Dexter. Love the books, love the tv show. I actually SQUEALED when I saw the first commercial for this season on Showtime! Seriously. I re-watched the entire series AGAIN to prepare for tonight. :-D Lame? Perhaps. Awesome? Definitely. Today's manicure is devoted to the man who likes to dismember... Dexter Morgan. :) (I'd considered painting each nail a different color as an homage to the ice truck killer in the first season, but thought it wouldn't really be considered nail art, so I didn't) The cartoon Dexter on the thumb is a mash-up of Dexter Morgan, and the illustration style and some characteristics of Dexter from Dexter's Laboratory, I dug it when I first saw it, and thought it'd be a fun addition to an otherwise gory manicure. :)


and the close-up/right side up picture of Dex on my thumb:


I used Essie Bone Chilling White as a base, with A Beautiful Life Poison for the blood spatter and DEXTER logo. For the thumb, I used American Apparel Summer Peach for his face and neck, OPI Ginger Bells for his hair, Orly Snowcone for his eyes, and American Apparel Hassid to outline everything, with, again, A Beautiful Life Poison for the blood spatter on his face and collar.

Did you watch Dexter tonight? It was a good one, for sure. I freakin' love this show!

Sally Hansen Diamond Strength in 'Flawless' review

About a week ago I made a trip up to my local Walmart to buy 2 things in particular. One was, uh a pair of earrings, but the other was the Sally Hansen Diamond Strength polish, specifically in the color 'Flawless.' Since this is a clear, I had in mind to use it as a topcoat, and basecoat if it allowed. On the bottle it points out that the polish is "NO CHIP." My mission was to test this product for a 5-day week.
I had recently gotten another Sally Hansen polish that I wanted to try. It was a Sally Hansen Hard as Nails product in "Sun Kissed."
Anywayyys, I applied a basecoat with the Flawless polish, and let that dry. I really don't have too much to say  on the application of the first coat. It took a little longer to dry than I'm used to, but Sally Hansen products tend to take a while to dry, or at least in my experience. Next I applied 2 coats of Sun kissed, letting it dry between each coat. I then applied one more coat of the Flawless over top of the color.
One thing I need to tell you about it, is it takes FOREVER to dry! I'm not even joking. It took about 20 minutes to dry to the touch, and then for about 3 hours after that it was still in the "dent-able" mode. Any slight   bump would make a small dent in the polish.


Let's talk about the bottle for a second. Some people may not care what the bottle looks like or how it feels, or anything to do with the exterior packaging for that matter. I'm kinda in the middle. I don't buy products just for how it looks on the outside, but I think the packaging does have quite a bit in the decision making for buying it or not, or at least for me.

The bottle has a really cute fake diamond on the front of the bottle, advertising the "Diamond Strength" that the polish has, which is also the brand. One thing I absolutely love, and I think all brands should have this little feature, is the cap. I wouldn't really think this from looking at it, but after using it I am sold on it. The shape of the cap is incredible! Haha.
It is really easy to get open, and fits very comfortably in your hands, which makes the applying all that easier. I absolutely love the design of it, and whoever came up with that is a genius. Of course some people may not like it, but after looking at some other reviews, it seems as most of other people like this feature too. What makes this cap so incredible is the 'hour-glass' shape of it. It just fits so comfortably in your hand.

I took pictures everyday for 5 days to show you what my nails looked like after each day. Keep in mind that each day I was fairly hard on my nails. The average, I guess. I wasn't trying to be hard on my nails, but I wasn't doing everything I could to stop them from chipping. I was washing dishes, doing laundry, typing, etc.

Beware, theres like 50 pictures. I'm a true


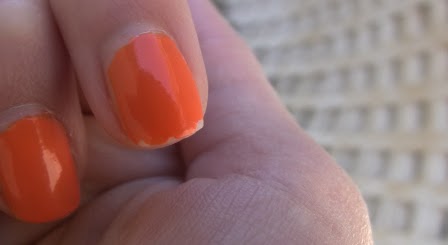
Day 1: (the day after I painted my nails, since I painted them on Monday night.)
Left Hand:

Notice there is no tip-wear. (Tip-wear is when the polish starts to wear/chip at the tip of your nail and also the part of your nail where you file them.) The lack of polish on the sides at the top is not chipping; it's from poor painting by me.


Day 2: 
Left Hand:


A tiny bit of tip-wear on the part where you file your nails. I can't remember if I painted that part or not, but I don't think so, so I'm pretty sure it hadn't started chipping any yet.

Notice the tiny chip on my left thumb.

Here you can see a little bit of tip-wear starting on my left pointer finger.

Right hand:

A tiny chip on my right hand pointer finger as well. These aren't that noticeable from the average person just seeing your manicure. In other words, there hasn't been chipping that you can see very well yet. If someone just looked at your nails for about 20-30 seconds, which most likely they won't look at them for longer than that, then they won't be able to see the chips that have started.

Day 3:
Left hand:
Seeing tiny chips on my middle and pointer finger. 

 The chip on my thumb is a bit bigger, but still not extremely noticeable, and there is also some tip-wear starting on the right side. (5 stars for dog in the picture??)
 Right hand:
The chip on my pointer finger has now gotten bigger and has started to go a bit further down my nail. On my right hand I'm also starting to see some fading in the orange color at the bottom of my nail. 

 Tiny chip on my thumb.


 In this picture you can kinda see the tip-wear on my other nails.


Day 4:
Left Hand:
The chip on my middle finger has gotten a bit bigger.

 The tip-wear on my pointer and middle finger.


 Right Hand:


The chip on my pointer finger has gotten a little bigger since the day before.


 My middle finger on my right hand has also begun chipping just a bit. I also noticed a little more color-fading at the bottom of my nails. I mainly only saw that on my right hand. 


This is kind of what all of my nails have been doing; tiny little chips on the sides of my nails and a little bit of tip-wear. 

Day 5: (final day)
Left Hand:

 Those little chips on the sides of my nails are also on my left hand.


Quite a bit of tip-wear.


 Right Hand:


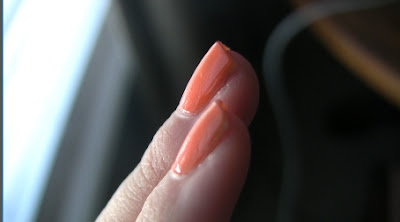
The chip on my pointer finger has gotten considerably bigger.


 All of the chips have gotten bigger.


You can also see the tiny dents in my pointer finger. This illustrates my point about the topcoat being in that "dent-able mode" for a few hours. There are also some tiny cracks at the side of my nails, but those are hardly noticeable when you just look at your nails.


As you can see, my nails did chip. I think what I should do if I want my polish to last longer is to re-paint the topcoat each day. The chipping wasn't too bad in real life, actually. I got really close with the camera so you could see even the tiny chips. There weren't any huge chips, just little ones. The main ones you could see were on my middle finger on my left hand and on my pointer finger on my right hand.

Note: I am right handed, so there was a bit more tip-wear and chipping on that hand.

Also, sorry about the dryness of my skin. It's getting cold and that's when my skin starts to get dry. 

Here's a bit more on this product:


How much was it? I got it for $4.

Where can you get it? I got mine at Walmart, but they have it at a bunch of drugstores.

Rating (1-10) - I'd say about a 4.5 to 5.

Would I buy this product again? I probably would.

Things I liked about this product? It made my nails SUPER strong! I think the main thing they were focusing on when making this polish is that it will make your nails stronger. It's a very good nail hardener/strengthener, so if your looking for just that, I would totally recommend this product. It also made my nails super shiny, and did protect my nail polish more than if I wouldn't have applied it.

Thing I disliked about this product? For one, I still did get chips in my nail polish. I wasn't expecting no chips whatsoever, but I had heard people saying it kept their polish on with no chips for a 7-day week. It didn't do this for me. It also took a while to dry, and if you don't want any dents in your polish, you will have to be very careful for about 3-4 hours after applying it. I did see some air bubbles, but they eventually went away after a day or two.

What will I use this for in the future? I'm probably only going to use it as a nail hardener, and not necessarily as a topcoat, however I may use it for a topcoat every now and then. 

Would I recommend this to a friend? I probably would, but I would make sure they knew what to expect. I think if your expecting a really good topcoat out of this product, you wouldn't be very satisfied with it. However, if you are using it as a nail hardener, I think you would love it 100%. I found my nails are very strong and grew pretty long really fast. 

All in all - I absolutely love this product as a base coat/nail hardener, but not so much as a topcoat. BUT I have heard people say they got no chipping and really loved this as a topcoat, so I think it works different for different people.       

I hope you benefited from this review and have made up your mind to buy, or not to buy, this product! Let me know your thoughts on this polish and whether or not you would purchase it again. 


Disclaimer: I am not affiliated with the company that makes this product. I bought this product with my own money and everything I said was my 100% honest opinion. I am not getting paid to do this review and the company doesn't even know I did this review.
My Zimbio My Ping in TotalPing.com